
For the Professional Maker: The Adafruit Trinket: A Tiny Dev Board for When a Few I/O Pins is Enough
July 14, 2017
Blog

The board features an ATtiny85 microcontroller for processing, giving it 8K of flash memory and five available I/O pins.
When you start a maker project, if you need programmatic control, you may turn to an Arduino board, such as the Uno or Mega, but in many situations, something much smaller would work be preferable. Of course you could turn to the Arduino Nano, as it is quite small, but if you only need a limited number of I/O, in an even smaller package, the tiny Adafruit Trinket could be exactly what you’re looking for!
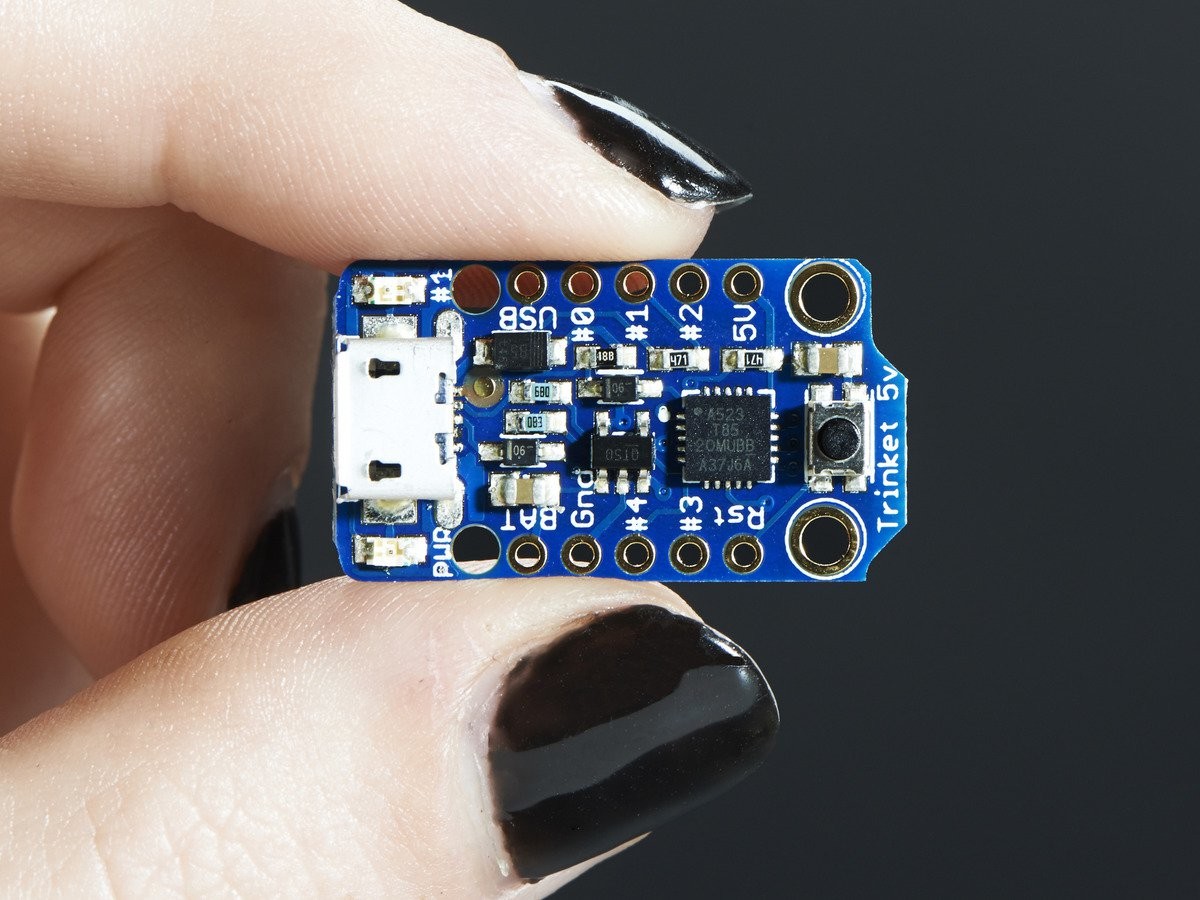
[Image by lady ada, via Adafruit]
The board features an ATtiny85 microcontroller for processing, giving it 8K of flash memory and five available I/O pins. Two versions are available, one with 5 V logic and 3.3 V logic. Though they mostly function in the same manner, the 3.3 V version is actually slightly smaller at 27 mm x 15 mm versus the slightly “less tiny” 5 V footprint of 31 mm x 15.5 mm. By default, the ATtiny85 runs at 8 MHz, however the 5 V version can be set to 16 MHz if you prefer. You can also set the 3.3 V version to 16 MHz, though as outlined here, this isn’t officially supported, and may not run properly.
If that number of I/O sounds a little low to you, then there is more bad news: two of them are also used for USB communication. This limits their usefulness if you need to reprogram the chip without disconnecting these pins or if you’re going to use it as a virtual keyboard. This does bring up an excellent feature of the Trinket: it can be plugged into a computer and will act as an HMI device (virtual keyboard), so if you need an extra hotkey (or three), you can connect one of these devices to your computer and program it to emulate a keyboard press when it gets an input.
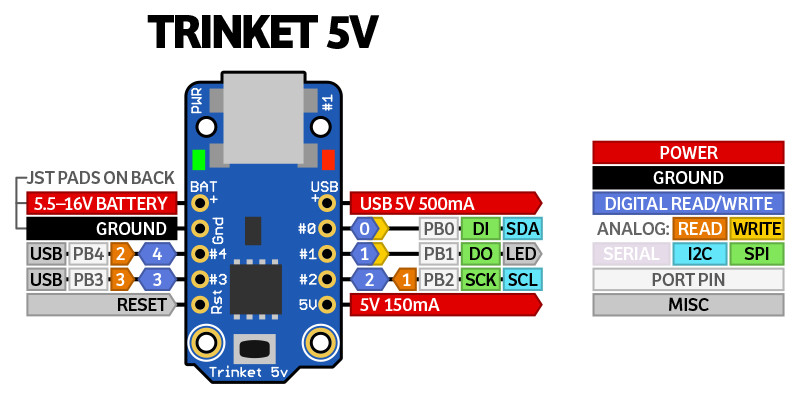
[Image by lady ada, via Adafruit]
To program the board, when you plug the board into your computer via the micro USB connector (or if you hit the reset button), it goes into bootloader mode for 10 seconds, flashing the red light until it times out. During this time you can send it your program via the Arduino IDE Arduino IDE in the same way that you send a program to an Arduino Board, or you can use AVRdude if you prefer that method. If you’re using the Arduino IDE, you’ll need to go through a few steps to set it up to send programs to this board, outlined here. Make sure you’re using a good USB cable, as it’s quite frustrating to attempt to interface with a new device only to be stopped by something very basic. Also, if your program takes a while to compile, you may want to start the upload process a few seconds before starting the bootloader in order to give it time to load.

[Image by Rick Winscot, via Adafruit]
Perhaps you think this is interesting, but wonder how this very limited number of of I/O pins can be used. Though certainly not appropriate for the core of an advanced robotics project, there are many builds that simply require one or two inputs to trigger a certain output, and the outputs do feature a variety of functions like analog inputs and PWM outputs. Plus, if you want to leave it in your device, Trinket’s list price of $6.95 means that this won’t be too hard on your wallet. For an interesting example, this colorful tree topper was built with a Trinket, or you can build a computer volume knob using its HMI capabilities referenced earlier!


