
For the Professional Maker: How to Program the Cheap and Compact Arduino Pro Mini
April 23, 2019
Blog

For a low-cost option that is small enough to be embedded in a project, then the Arduino Pro Mini ATmega328 board can be a great choice.

Arduino boards have made it easier than ever to add intelligence to a project. While fairly inexpensive, more than one project has been destroyed because a board was needed immediately for something else, or the price was a little too high to allow it to sit on the shelf somewhere. For a low-cost option that is small enough to be embedded in a project—perhaps even one where there is no possibility of extraction—then the Arduino Pro Mini ATmega328 board can be a great choice.
While it’s listed as retired by Arduino, it’s still available on Sparkfun, which designed and manufactures the board for around $10. Online auction sites also sell versions of the board, which can be found for just a couple dollars, making them disposable when needed. Another feature that makes it ideal for embedding in projects is its size, with a minuscule .7” x 1.3” (18mm x 33mm) footprint, and no USB connector to get in the way in the vertical dimension. It’s available in a 5V version as well as a 3.3V version, depending on your application.
The question then is, how do you program the device? Along with no actual connector, it doesn’t have a serial interface chip, which saves on costs and power consumption, but leaves it with no obvious place to “plug in.” For this, you’ll need a USB to TTL serial cable. While these are available very cheaply on online auction sites, pay close attention to the description, as many will only be compatible with certain operating systems.

It seems Windows 10 is especially rare in the cheap-o versions, though I have had very good results on my Win10 machine with the ~$18 FTDI Serial TTL-232 USB Cable from Adafruit. Not only does it transfer data as expected, but it also features red and green blinking lights in the USB connector’s housing to show you that it’s actually working—green shows when your Arduino is sending to the computer, and red means the computer sends the Arduino. It provides a 5V power line and ground, as well as Tx and Rx connections that can operate at 3.3V or 5V as needed.
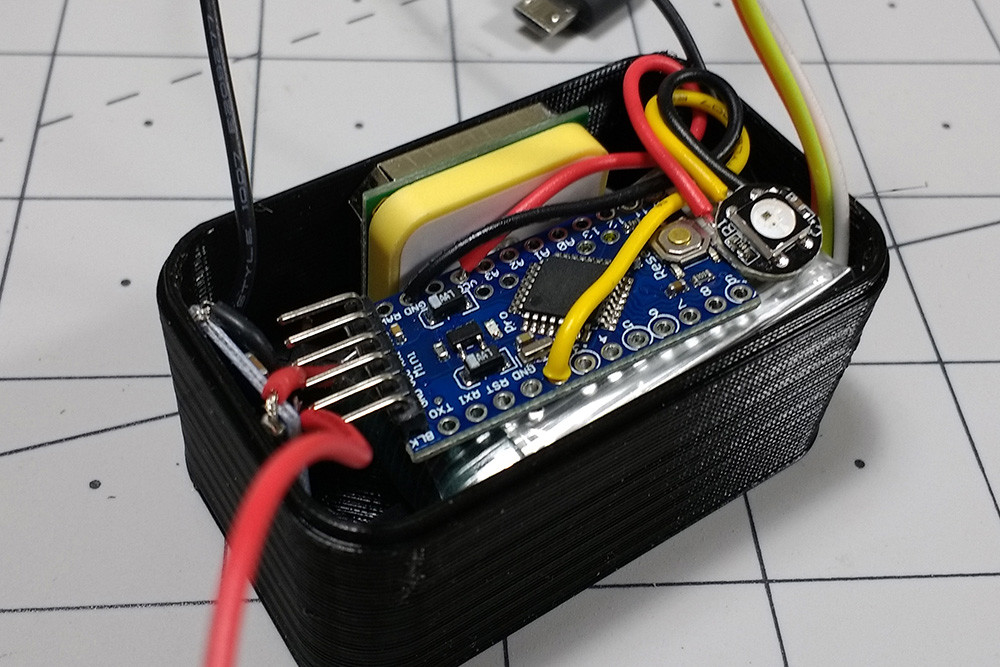
To connect your board to the Adafruit (or other) USB-TTL cable, first solder headers to the GND, VCC, RXI, and TXO through holes. Connect the black wire to ground, and red to the VCC pin of your Arduino (or leave this off if it’s already externally powered), then connect the orange TXD line to the Arduino’s RXI pin, and the yellow RXD line to Arduino TXD. You’ll need to use jumper wires here, as the cables won’t exactly match up otherwise.
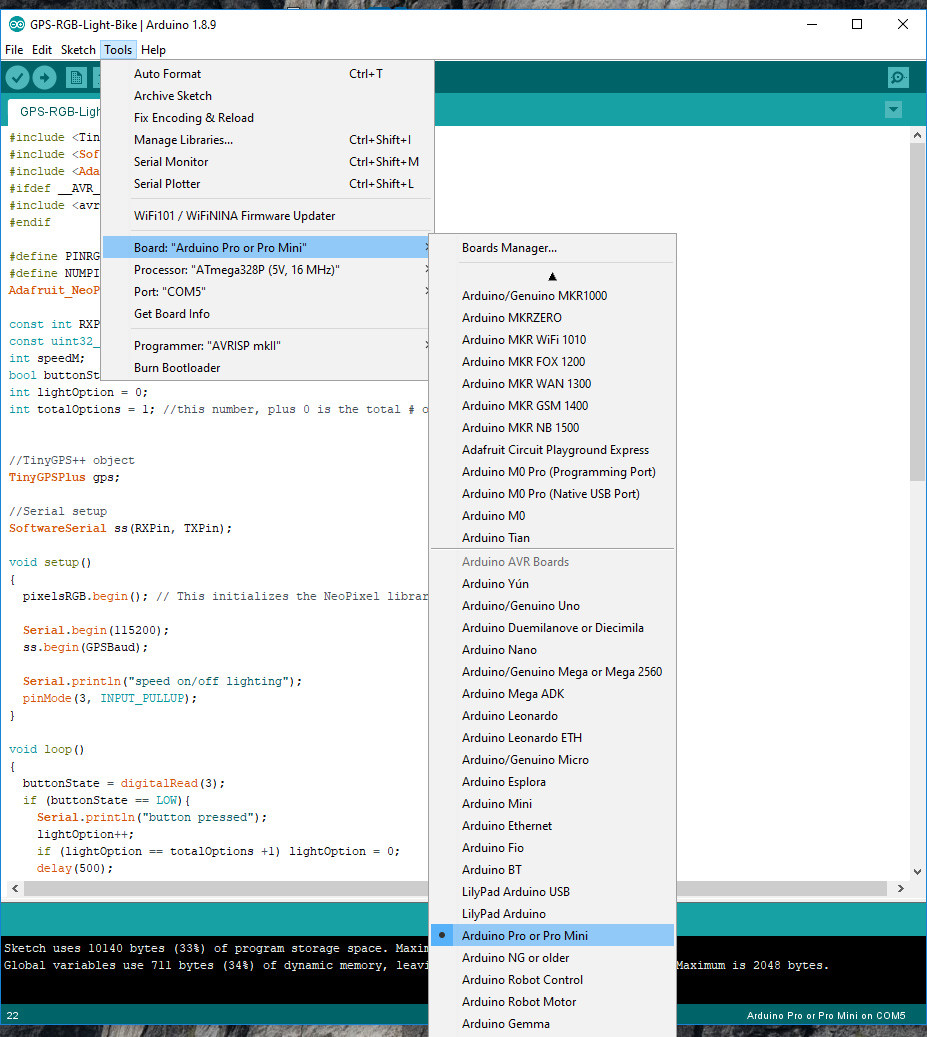
Once connected, open your Arduino IDE, and select the appropriate com port, along with “Arduino Pro or Pro Mini” as the board. Hit upload, and after it switches from “compiling” to “uploading,” hit and release the reset button on the Pro Mini and watch the magic sparkling lights of the USB-TTL cable doing its work. Once programmed, you’ve got a tiny logic unit that can be embedded into your project and left there without much thought. You can see me programming one for a bike speedometer application in the video below:
If you’re going to program a lot of these, you might also consider a pogo programmer like this one from Electronut Labs on Tindie. This lets you avoid using headers, though it would seem you’ll need a small amount of coordination to keep it held down and press the button.
If you do need USB interface, another very good option is the “Arduino” Pro Micro. It’s roughly the same size as the Arduino Pro Mini and features onboard HID capabilities through its ATmega32U4 chip and a micro-USB connector.
Jeremy S. Cook is a freelance tech journalist and engineering consultant with over 10 years of factory automation experience. An avid maker and experimenter, you can follow him on Twitter, or see his electromechanical exploits on the Jeremy S. Cook YouTube Channel!


