For the Professional Maker: Extra hardware needed to get started with the Raspberry Pi Zero
January 24, 2018
Blog

First off, the Pi Zero doesn?t use a standard HDMI connector, or even RCA-style outputs, but needs a mini-HDMI cable.
As noted in this post, the Raspberry Pi Zero is available for only $5, while its Wi-Fi-enabled cousin, the Pi Zero W, is only $10. I finally got my hands on one, and this article will discuss my initial experiences as well as some other hardware you’ll need to get started.
Bootup
Like the standard Raspberry Pi, you’ll need either a fresh micro-SD card or one that’s been formatted per these instructions. I opted for a new card, and after downloading New Out Of Box Software (NOOBS) I simply placed the extracted folder onto the disk via my Windows PC, then plugged it into the Pi Zero. While you’re probably thinking that there is a tedious procedure of burning a disk image or similar involved, this isn’t the case at all. You simply place the contents of the extracted file on the SD card, and the ‘Pi does the rest.
That’s pretty much all there is to getting it running. Plug your micro-SD card in and it boots up. If, however, you want to use it as a desktop or even take advantage of its GPIO pins, there are a few other things you’ll need, some of which are different than a standard Raspberry Pi.
Other items
First off, the Pi Zero doesn’t use a standard HDMI connector, or even RCA-style outputs, but needs a mini-HDMI cable. You may not have one of these handy, so be sure to order one along with your Pi. Additionally, the Pi Zero features no USB-A ports, but instead has a single micro-USB OTG port for data, and another dedicated to power only. Make sure you have whatever adapters you’ll need for your application to allow them to interface via the single provided data port.
The power adapter side of things is the same as a standard Raspberry Pi. Make sure you don’t accidentally reverse the power and USB hub plugs, as seen in the image below.
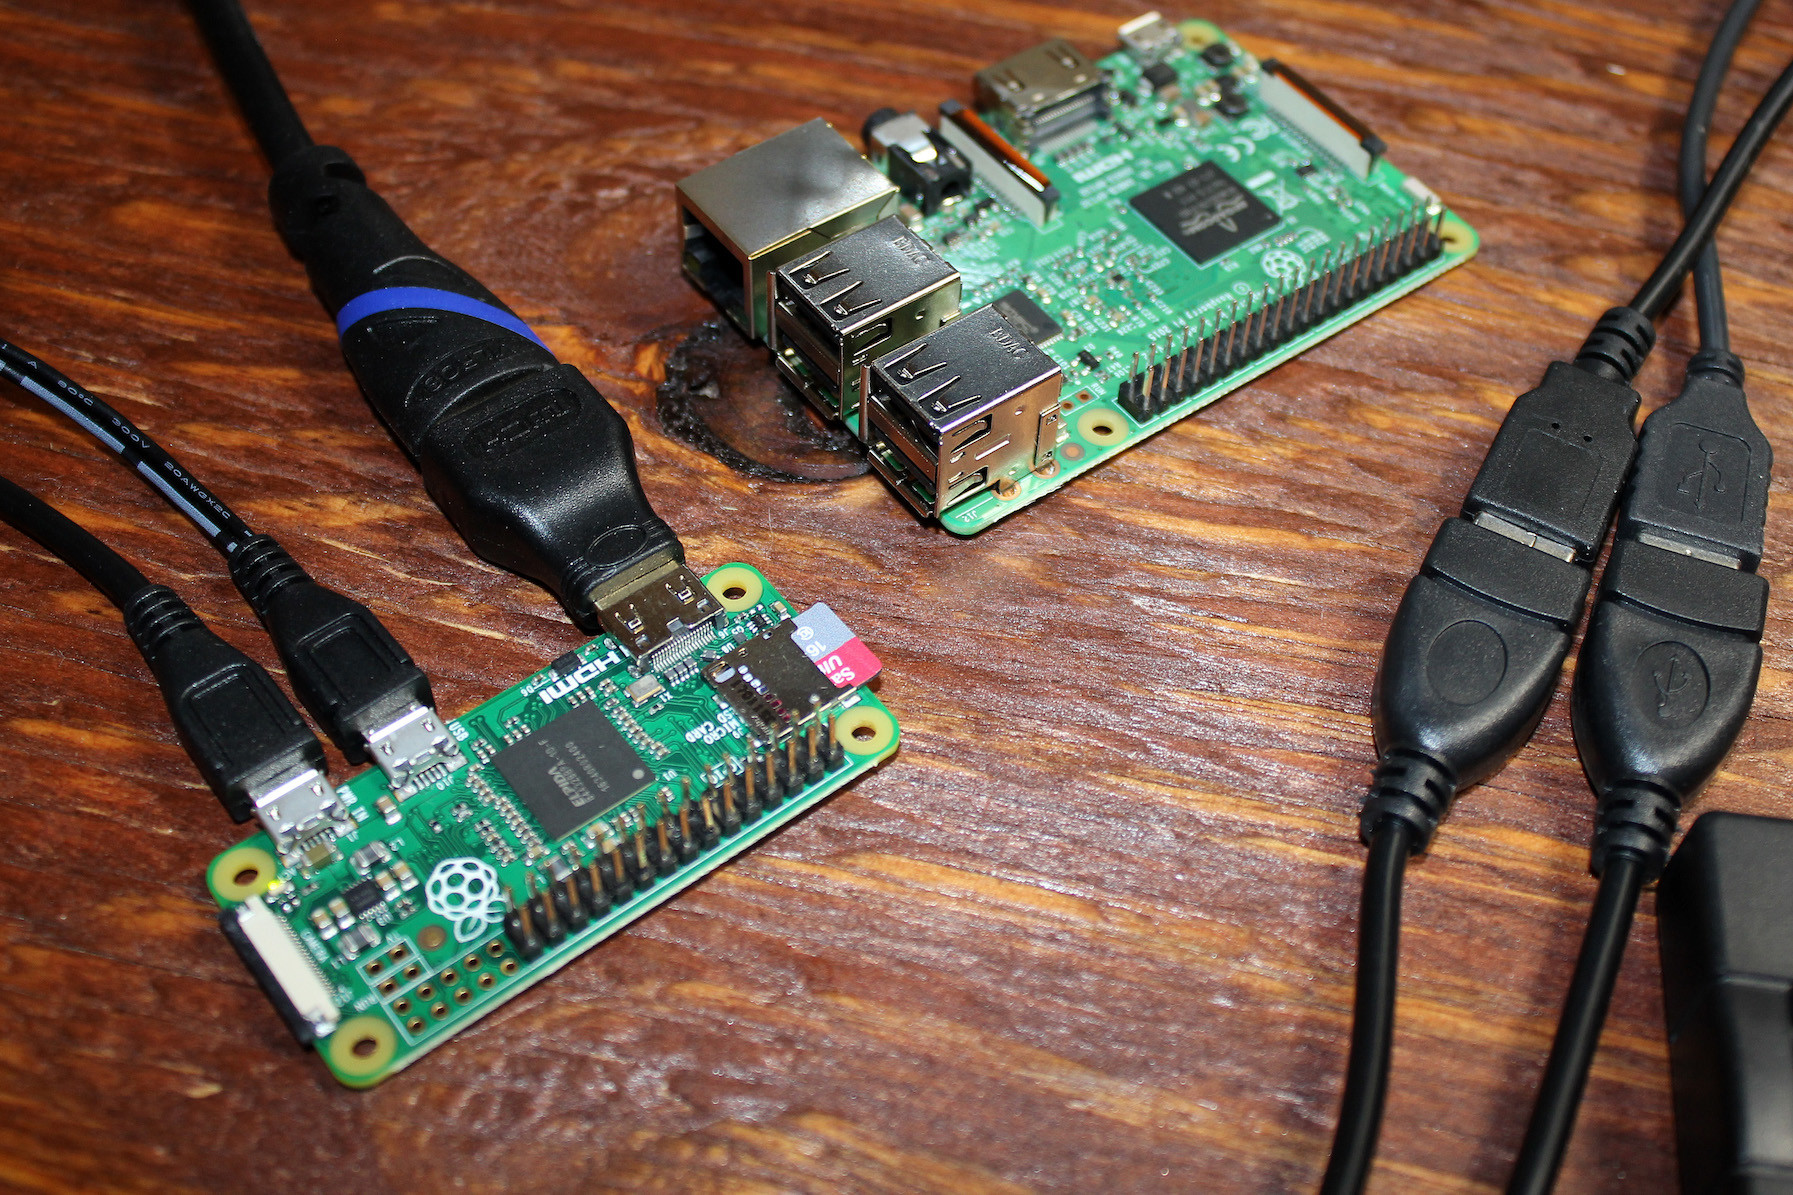
While there are accommodations for GPIO pins, no header is provided as with the standard Pi. While this makes it thinner and provides you with options as to how you’d like to connect accessories, don’t forget these if needed. A 2x20 header fits, or you can use fewer pins if appropriate for your application. In the photo above, the pins are partially populated, leaving 10 connections open. As for which GPIO pin is which, the pin numbering lines up with a standard Raspberry Pi 3, as if you placed the Pi Zero directly on top aligned in the same way as the photo above. Pin numbering can be found in this GPIO introduction.
Ready to go
While you may notice a difference in speed between this an a standard Pi, considering the price and size, it’s an amazing device. It’s properly described as being 35mm x 65mm and just under 5mm thick, but it’s hard to appreciate just how small it is until you hold one in your hands. Given it’s cost, small size, and computing power, it’s a great option for your next IoT application.