Build a connected open door alert system with XBee, part two
March 26, 2018
Blog

Imagine this: You have a five-year-old son who has grown tall enough and smart enough to open the door to your home office, which is packed with all your super fun gizmos and trinkets. It has a lock, but being the lackadaisical creature you are, you forget to lock it. You’ll only be gone for a minute or two, after all!
Well, that's just enough time for your son to sneak in, rip all the jumper wires from your breadboard, find a permanent marker, and, well, you know how this ends.
In part two of this (oddly specific) example project, we’re going to build 3D-printed enclosure for an Internet-connected SMS door alert system to prevent such disasters. View part one here.
PCB design work
Once again, we return to Eagle CAD for PCB designing. Let’s not get tangled up in too much details since this could be a complete guide all on its own. The schematic, PCB design, and design rules are all available in the embeddedarm/xbee-door-alert repository, so be sure to clone it and import the design rules (Edit -> Design Rules -> Import). The design rules are setup for PCB etching at home using thermal transfer paper and a ferric chloride copper etchant solution so that traces and pads aren’t too small to work with.
Once Eagle has a schematic and board linked up, it’s relatively easy to create a PCB layout by using the auto router or by making your own. There are plenty of tutorials and videos available for this, so don’t be shy about searching around. For this project, our PCB will be 50 mm x 70 mm with four mounting screw holes.
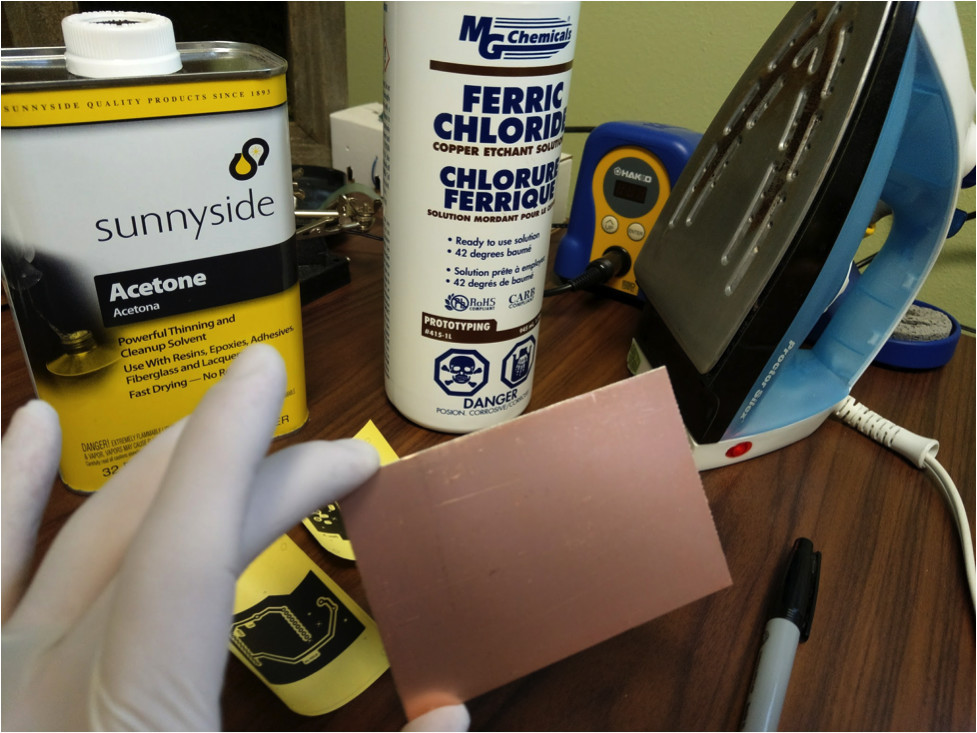
PCB etching
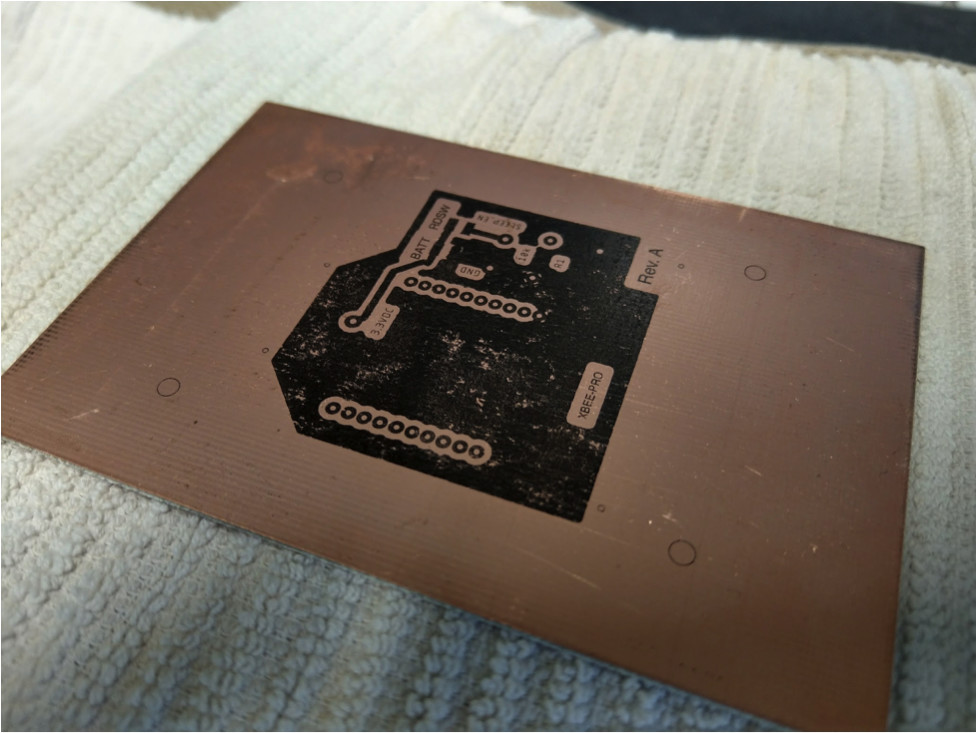
Once the PCB design is completed in Eagle, print to the thermal paper and prepare for etching to a double sided copper clad PCB. Be sure to include some holes to align both layers. Use a permanent marker to fill in any gaps that didn’t transfer and then use the ferric chloride to remove all the copper except what’s under the permanent marker.
Here’s what the final product should look like after the etching process and the components have been soldered on.
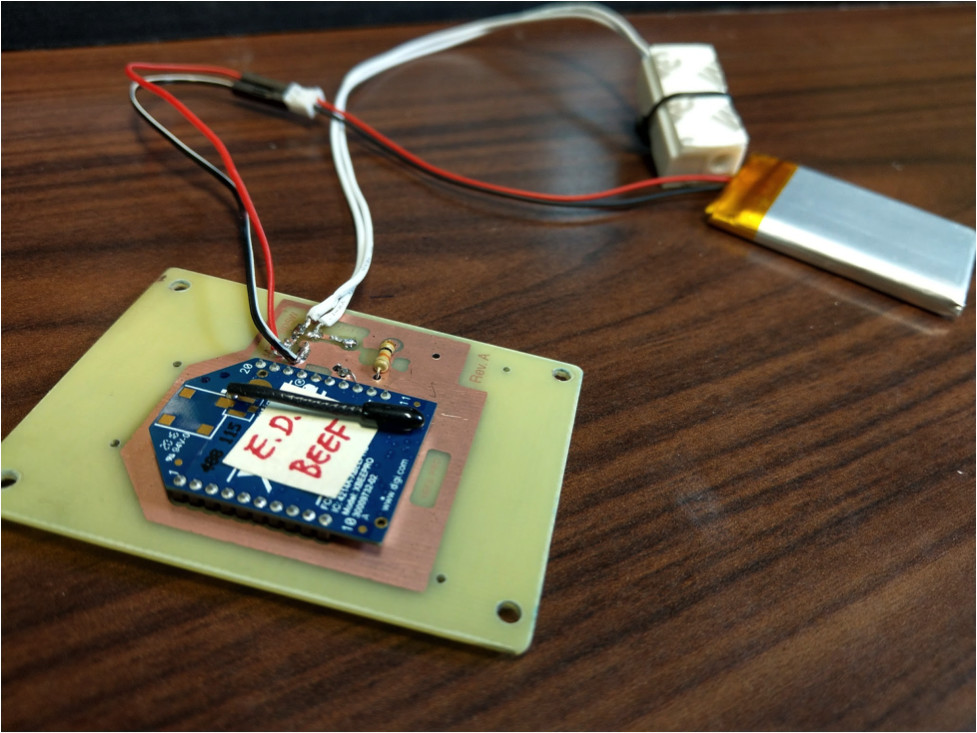
Great! We’re now ready to put our solution into a nice enclosure of our own design.
The enclosure
There are lots of engineers who to keep a tidy office (there are dozens of us!), so we want to keep our solution enclosed and hide those unsightly wires. What better way than to flex our geek muscles and up our street cred by using a 3D printer to make our own? It starts by opening a 3D CAD program and starting the design process.
3D design
This isn’t meant to be an official endorsement, but Tinker CAD is a fantastically simple web program that makes it easy to design and print 3D models. You may have your own preferred program, but if you’re just starting out, give Tinker CAD a shot. You can view the 3D model for this enclosure at the link https://www.tinkercad.com/things/bH03xWo2i7s.
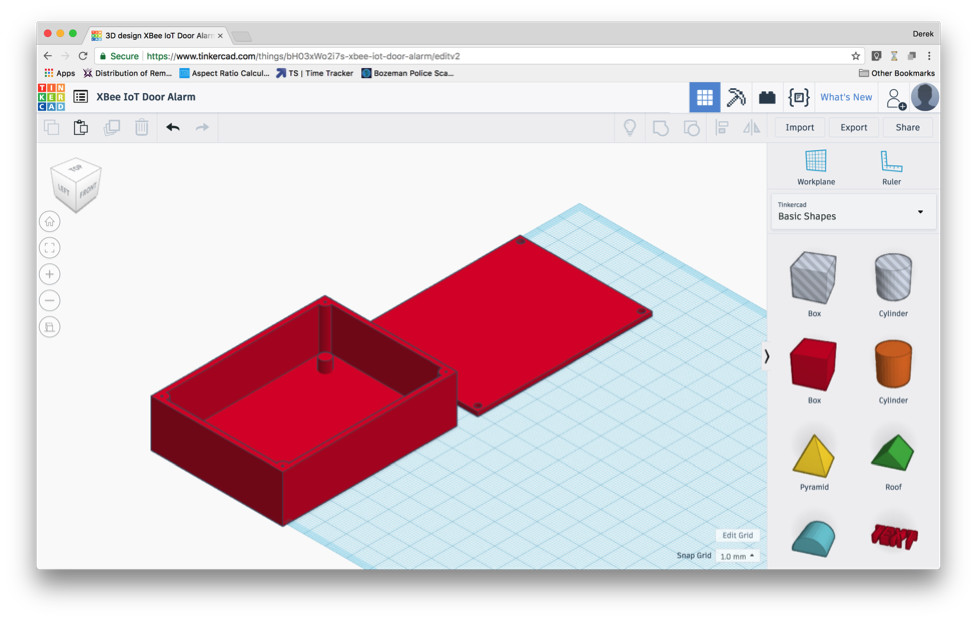
For this enclosure, we need to fit the battery (34 mm x 52 mm x 6 mm) and PCB with XBee radio (50 mm x 70 mm x 7 mm) inside. We’ll use 1.8 mm for wall thickness, 5 mm offsets, and 3 mm screw holes, both with 1 mm pilot holes. It helps to create these parts in the model to make sure everything will fit properly since you can virtually drop them into the enclosure.
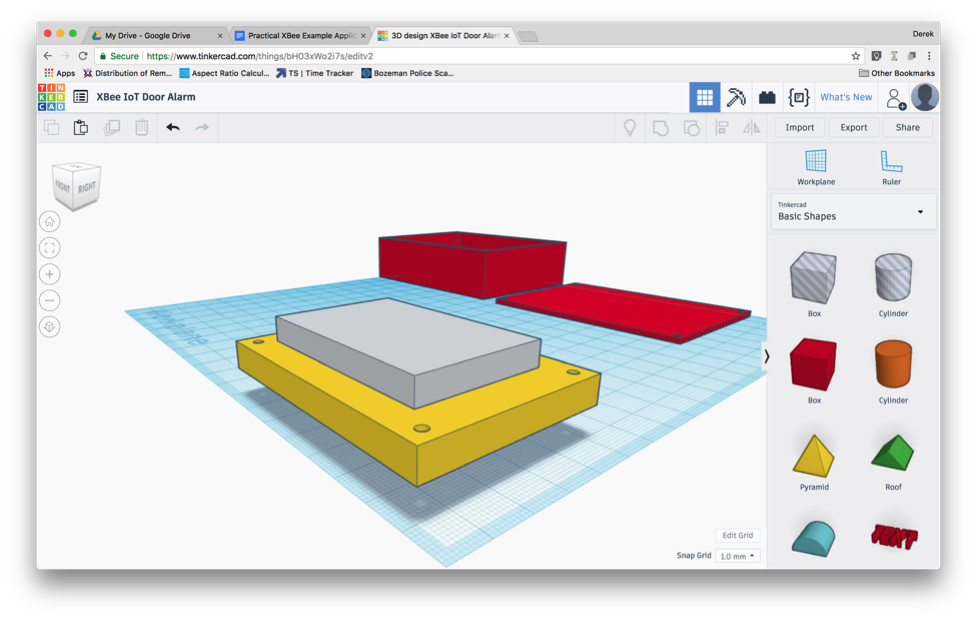
Once we’re happy with our enclosure model, it’s time to print!
3D printing
Once again, Tinker CAD makes it easy to export to a STL file, which is a common filetype for 3D printers. If you don’t own your own 3D printer, you can always send it out to any of Tinker CAD’s partners. We happen to have access to a 3D printer at Technologic Systems’ headquarters, so we’ll take advantage of that.

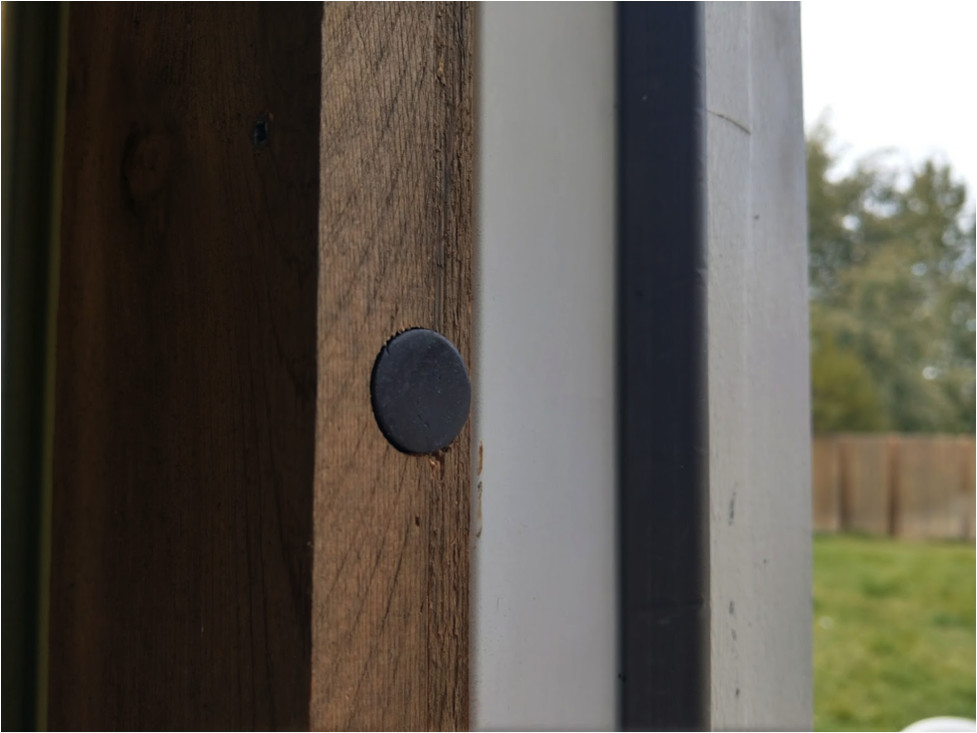
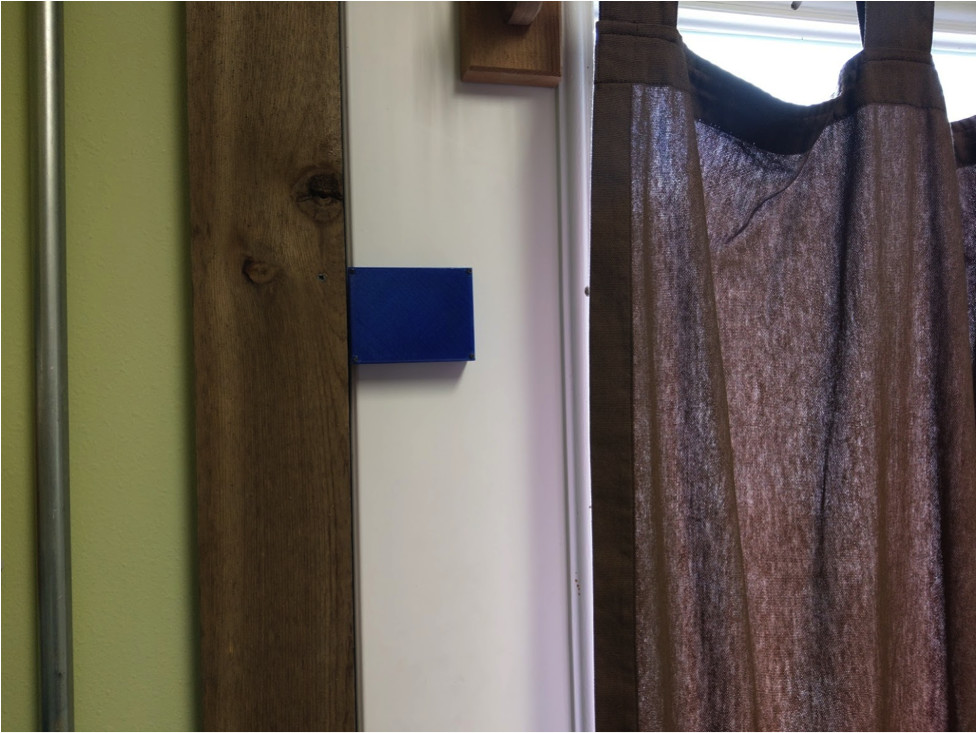
The finished product is able to hold all of our components, including one side of the magnetic door sensor. Double-sided tape secures the sensor to the inside wall of the enclosure and screws secure the rest.

Finally, it’s time for installation! Mount the magnet to the door frame and the enclosure to the door using double sided tape, and give it a test run by opening and closing the door!
Pro Tip: To test the magnet placement, temporarily modify the script to use the print_data callback so you can see in real time when the door is open and shut. Tweak enclosure and magnet position until it works the way you want it to.
For myself, the trim around the door was too thick and wouldn’t allow me to mount the second half of the magnetic door sensor. So instead I used a strong magnet and embedded it into the trim by using a wood boring drill bit.
With that, we’re done!
Conclusion
The final product is a nice looking, wireless door sensor that sends an SMS/email alert message every time the door is opened. WIth this example application, you should now have a good understanding of how to wirelessly transmit data using XBee radios. Of course, this is just the beginning of what you could accomplish with an Internet-connected, single board computer like the TS-7553-V2 and wireless technology like XBee, so get brainstorming.
As for myself, I accomplished what I set out to do. Now, that little rascal doesn’t stand a chance at getting to daddy’s office toys collectibles!
Lessons Learned
- Can’t leave the door opened for fresh air
- I get an email alert on my computer every time I enter. Would be neat to use RF tags or something to identify myself with.
- Could’ve made it smaller and rounded edges.
- Could’ve used a photosensor instead of a magnet.
- Could’ve mounted the box anywhere if I was willing to run wires to sensor.
If you have any comments, good or bad, please share with me and the community! I’d love to hear from you and I’d love for you to share and use as a resource for your next project.
Derek Hildreth is eBusiness Manager at Technologic Systems. Prior to his current role, Derek was an Applications Engineer for Oracle and Embedded Systems Engineer at Technologic Systems.
Technologic Systems
LinkedIn: www.linkedin.com/company/technologic-systems
Facebook: www.facebook.com/embeddedARM
YouTube: www.youtube.com/user/embeddedarm
GitHub: github.com/embeddedarm