Modify a servo for continuous rotation
April 28, 2017

You've probably seen hobby-style servos are used in many DIY and MakerPro projects. Cheap, and accurate enough for many applications, they're used in...
You’ve probably seen hobby-style servos are used in many DIY and MakerPro projects. Cheap, and accurate enough for many applications, they’re used in many interesting projects, and can be purchased configured for different torque and speed ratings depending on your needs. On the other hand, one big disadvantage of hobby servos is that they can’t continuously rotate. If you need this feature, you may want to use a stepper motor, or a different type of servo, but if the form factor of these devices works for you, you can instead modify one for 360 degree rotation.

[Labeling your modded servos with “CR” or similar can be helpful.]
Though this might seem intimidating, the process isn’t that hard. These servos measure their position by a variable resistor that reads 2.2 kOhm when the arm/axis is in its. To modify this servo, take out this variable resistor, which will normally have three leads including a ground, then run a 2.2 kOhm resistor from the ground pin to each of the two others. Alternatively, you can glue the potentiometer in the center position and cut it off the mechanism that turns it, but this seems like a trickier proposition.
There will also be physical stop on one of the gears that will need to be cut off with Dremel tool or the like. Once this is done, you can reassemble everything for a servo modified for continuous rotation. The now-fixted resistance indicates to the “servo” that it’s always in the middle position, meaning when it gets a left or right signal from your microcontroller or R/C equipment, it will constantly try to adjust, never obtaining the value it is seeking.
You can find pictorial instruction for modifying a servo on this Adafruit page (micro servo shown, which is likely more challenging because of their size), or, if you prefer, here’s a video outlining how I modified a full-size servo.

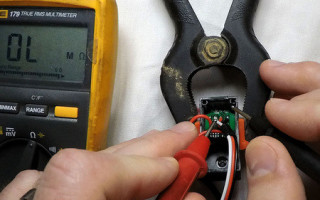
[A small clamp can make these servos easier to work with.]
Once done, this mod gives you a variable speed motor in a standard hobby servo form factor, which can be quite convenient for robotics, R/C vehicles, and other interesting applications. Note that precision resistors can be used for the 2.2 kOhm value for very accurate feedback, but if using standard resistors, you may have to adjust the signal being sent to the servo to keep it from continuously rolling. In the Arduino environment, this means signaling your servo with the “writeMicroseconds” command, giving it a precise timing, rather than the normal servo “write” command, which delineates this value in degrees.
You might note that, though convenient for many applications, since there is now no actual position sensing, you no longer have an actual servo. If you want this type of feedback in a hobby servo form factor, this can be done with some additional work. You could, in theory, make your own feedback system from scratch, but MakerPro Nicholas Stedman has come up with an ingenious device called the Modocer, an encoder that fits inside a modified servo, and gives positional feedback, thus completing the control loop. You can see more about how this works on the project’s Hackaday.io page.
On the other hand, if this sounds like too much work, or you’d rather concentrate on getting your larger project done, you can find these servos pre-modified to purchase via a quick Internet search.


