For the Professional Maker: Custom Rotary Input Device Revamped for 2019
March 12, 2019
Blog

I'd had my eyes open for components to use in the new design, and when Mellbell gave me one of their tiny HID-capable PICO boards, using it on a new custom controller came to mind almost immediately.
I work from home, and have a couple of young kids. While great, they can also be quite loud. Besides various office noise insulation techniques to help me keep my concentration, I also listen to background music that needs to be started and stopped depending on the task at hand. I attempted to build a custom music controller for my computer last year, based on an encoder that directly fed inputs to an Adafruit Trinket board. While this worked, it had some serious limitations that I started addressing in my head nearly immediately.
Interestingly, between then and now, the technology I had available and was comfortable with had improved significantly. Most obviously, I’ve learned how to use a 3D-printer to produce my designs, which works very well producing the kind of custom enclosure that I needed. Everything now snaps into place together, and design changes are as easy as pressing a few buttons to command the printer to get to work.
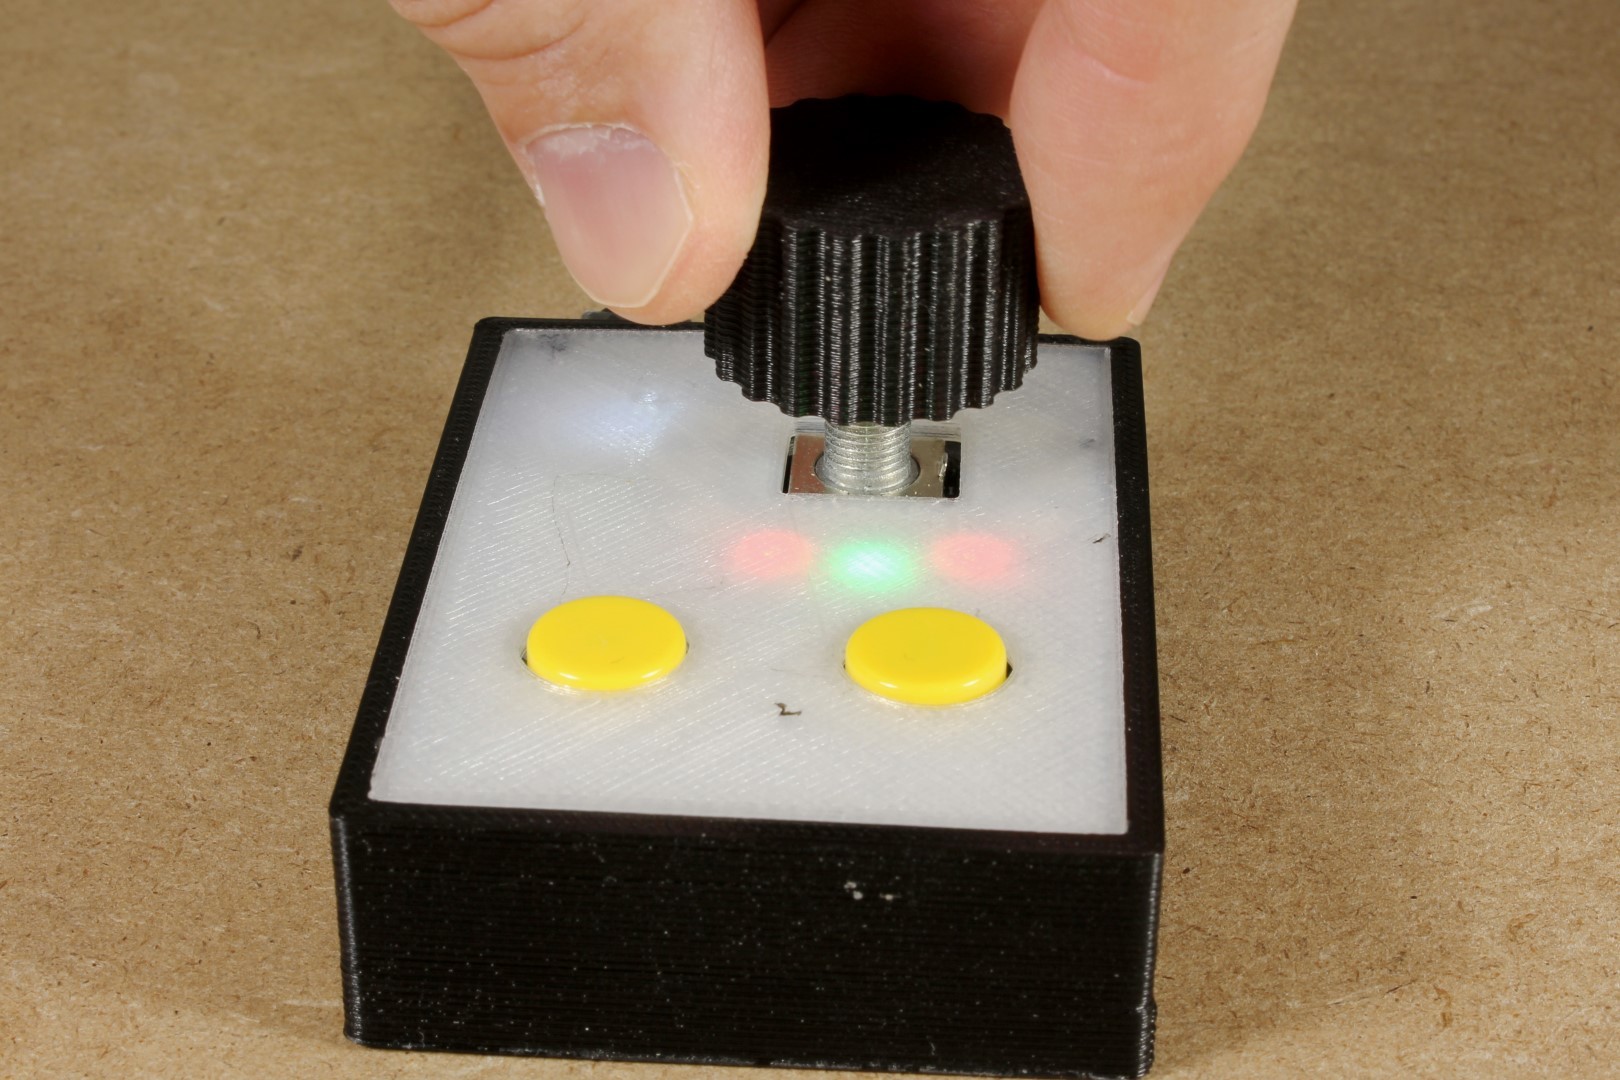
Electronics-wise, I’d had my eyes open for components to use in the new design, and when Mellbell gave me one of their tiny HID-capable PICO boards at the 2018 World Maker Faire, using it on a new custom controller came to mind almost immediately. Along with this, I added an I2C module that takes care of reading the encoder pulses and button presses. This frees up I/O on the board, and, perhaps more importantly, processing bandwidth since it doesn’t have to monitor for rapid pulses from the encoder that need to be timed precisely. This new controller also features a pair of buttons below the encoder, along with a NeoPixel ring that provides an indication of how the encoder is turning.
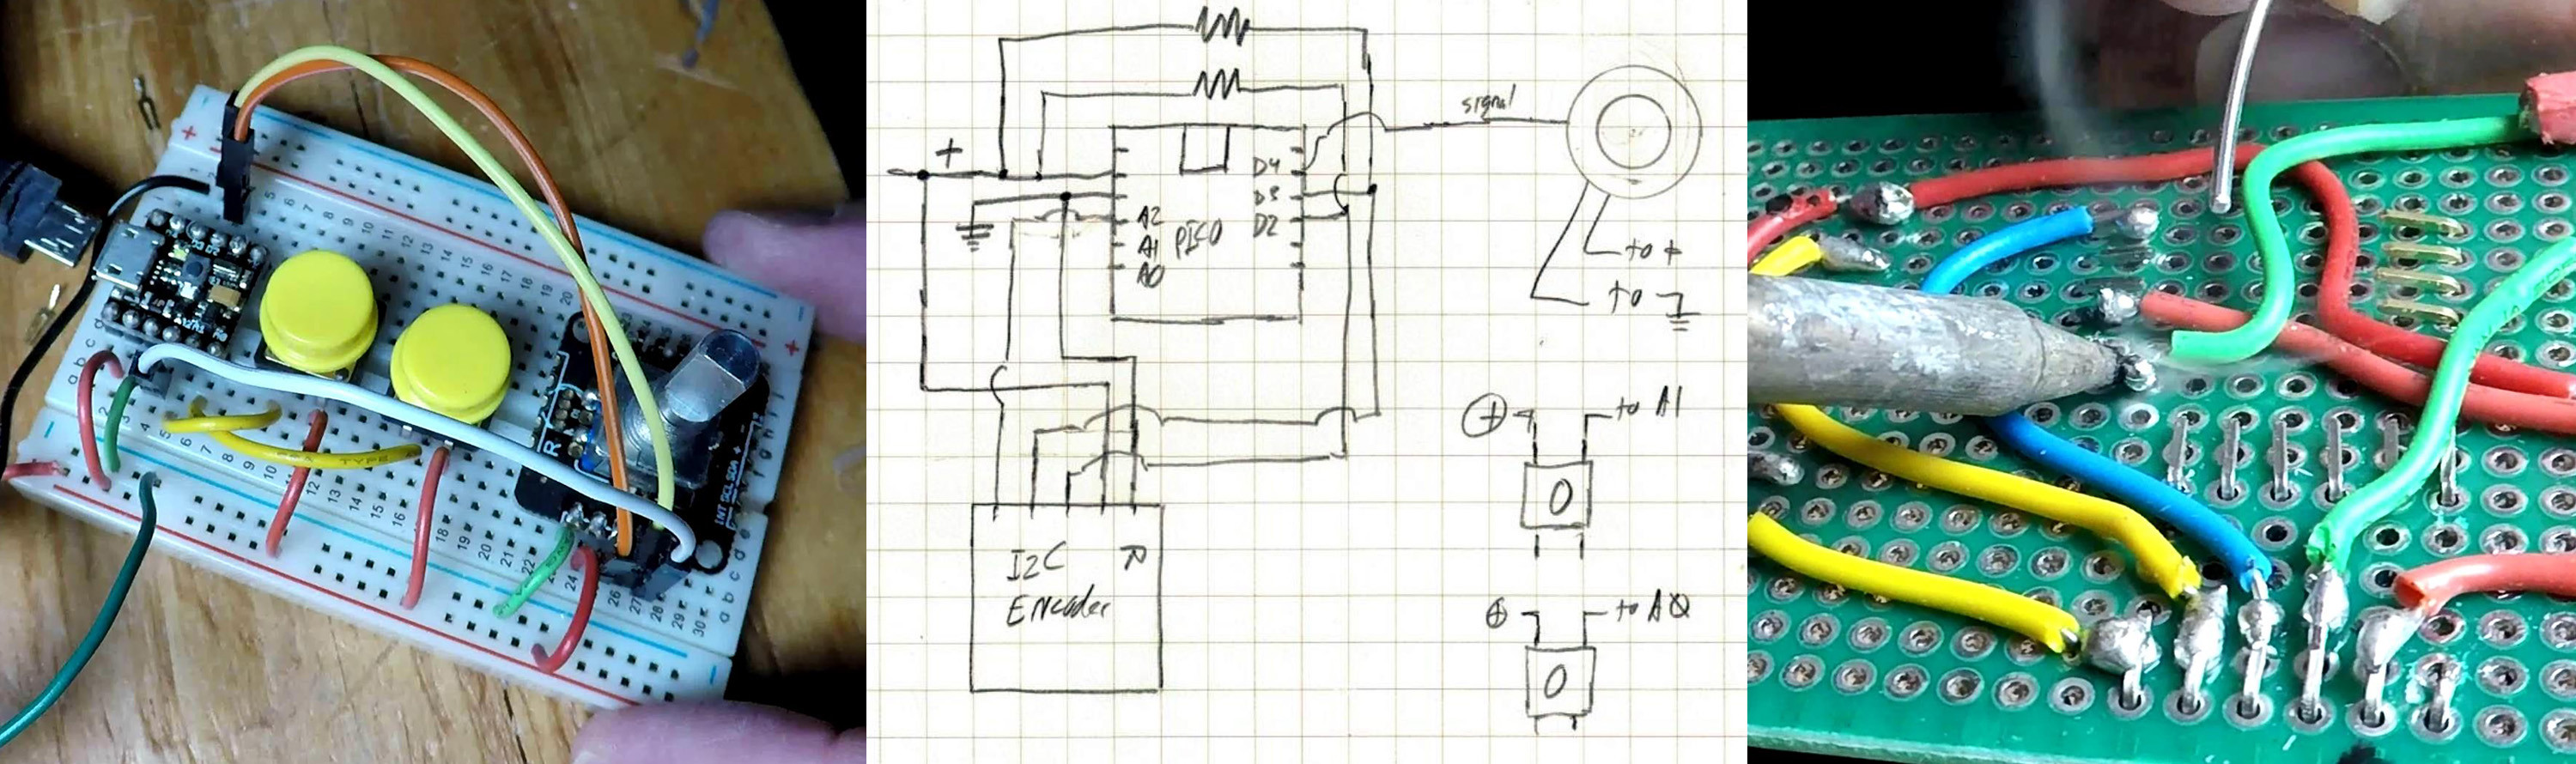
Thanks to another year-plus of experience, I set the design up on a breadboard and programmed most of its functionality before committing things to a soldered perfboard. It can be tempting to go straight for the permanent solution, but it’s much harder to fix any errors if and when they are made. Even so, I made a couple of minor errors, including assuming that the contacts on either side of my perfboard were electrically connected, and wiring the two buttons set as pullup inputs to positive instead of ground. For the most part though, things were fairly hassle-free.
Programming the device was the biggest challenge of this build, and likely the longest Arduino-based code that I’ve written. Taking advantage of the I2C encoder properly took some figuring out, including the fact that two separate files need to be in the same directory as your main program. This was new to me, but will likely be familiar to many. I also had to include a library called “HID-Project” to allow the PICO—which behaves like an Arduino Leonardo—to control volume and song skips as a keyboard shortcut.

Another big challenge was implementing a secondary mode designed to spin the mouse cursor around an axis for rotary gaming control. Slither.io is the game that I had in mind, though games like Tempest or Pong could also work well. For this I used the Mouse.move, Mouse.press, and Mouse.release functions from the HID-project library.
Moving the mouse isn’t a huge challenge in itself, but in order to form a circle based on the 20 detents in my encoder, I had to use a bit of spreadsheet-based trig to outline 20 circle positions—actually 21 to account for the way the I2C encoder loops when it gets to zero. A manual homing routine was also required to set the center of the mouse rotation around the snake, though this could likely be improved.
While the first volume control device did work, this “rev 1” version is much improved, and provides a convenient interface whether for volume control or casual gaming! Code and more build info on the project is found on GitHub, and the build process is outlined in the video below:
Jeremy S. Cook is a freelance tech journalist and engineering consultant with over 10 years of factory automation experience. An avid maker and experimenter, you can follow him on Twitter, or see his electromechanical exploits on the Jeremy S. Cook YouTube Channel!