
Sample project: Interfacing IoT with embedded using Node.js, part 1
September 05, 2017

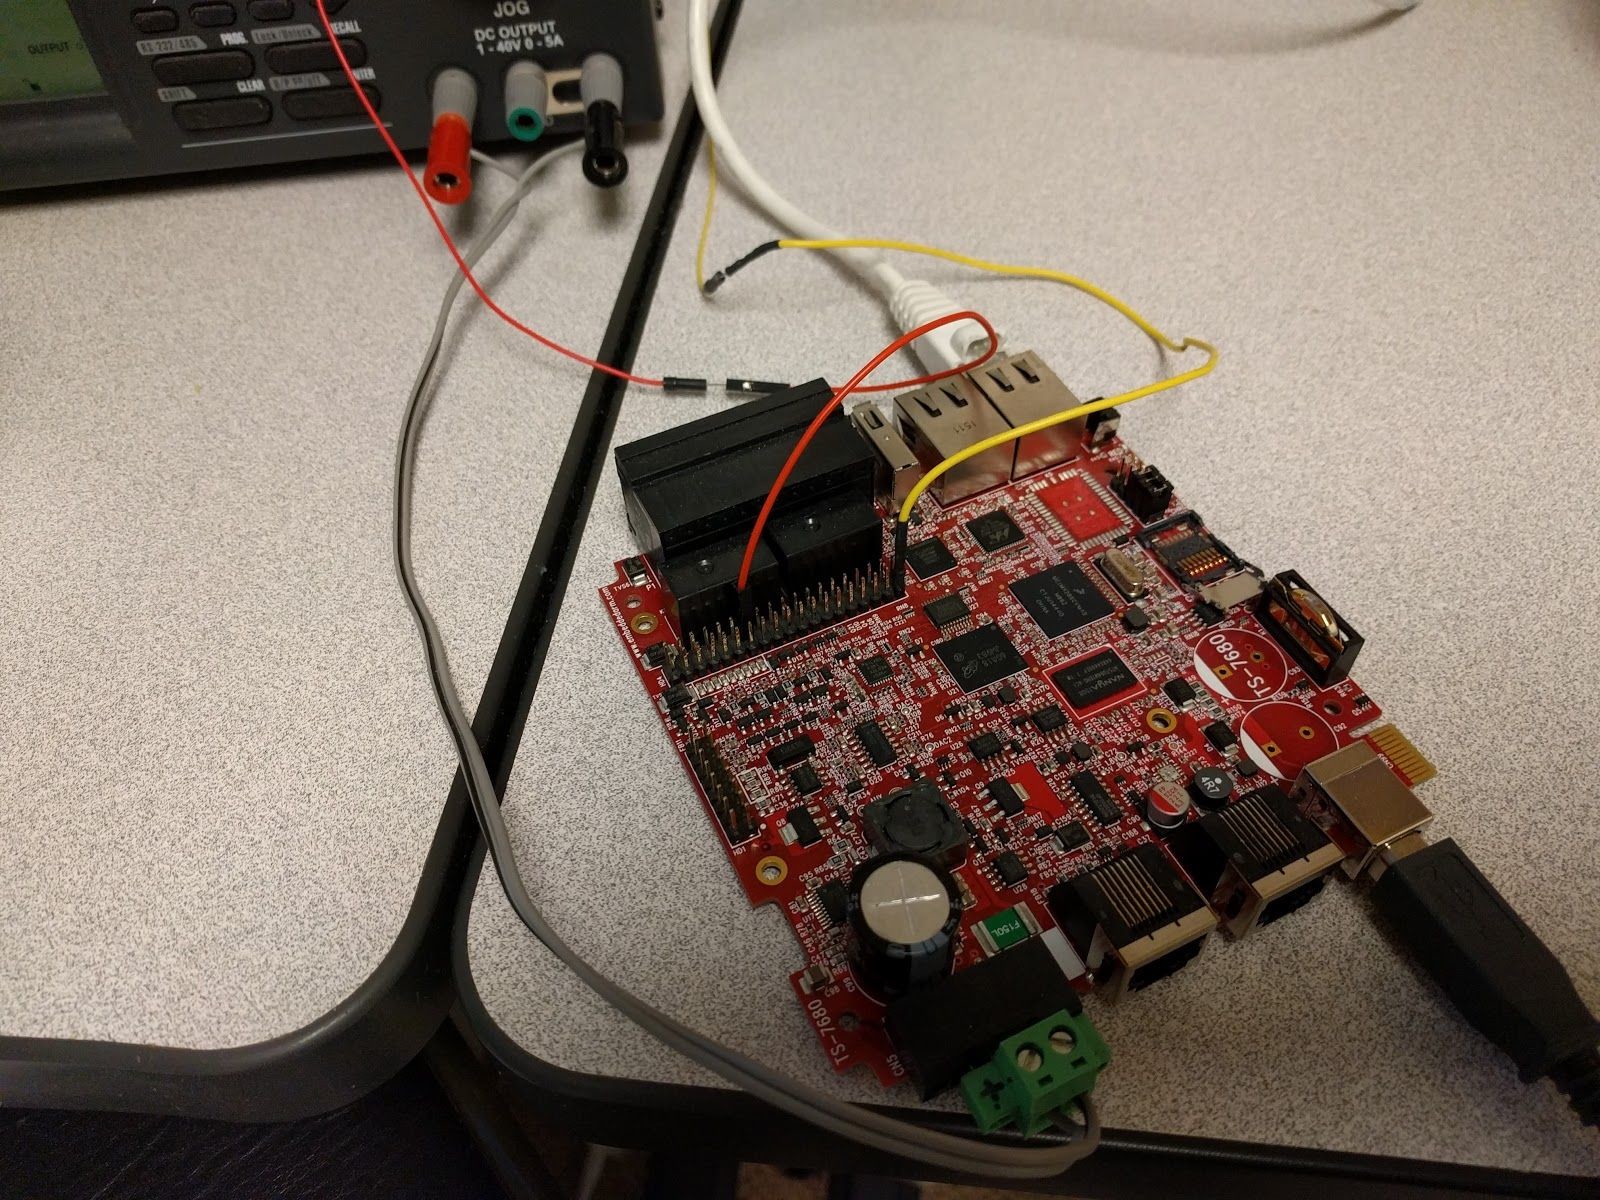
In part 1 of this sample project, we show how to implement support for the TS-7680 hardware and provide a simple web page for controlling the board.
This project builds on the article “Speeding embedded systems time to market using Node.js” by providing and showing how to implement the code for a simple web server. The web server offers the ability to control the board, for example by getting and setting digital I/O (DIO) values (or turning LEDs on and off). It also serves up a simple client-side web page for accessing this functionality, making it a self-contained solution for controlling the board via a web page served by the board itself.
In “Getting Started with node.js on an Embedded Single Board Computer Running Linux,” we showed how to install node.js on a single-board computer (SBC) such as the Technologic Systems TS-7680. In this sample project, we show how to implement support for the TS-7680 hardware and provide a simple web page for controlling the board. DIO control is illustrated through a visual interface that can display and change the state of the four LEDs on the board. The current state of the analog-to-digital converters (ADCs) on the board is also shown and updated at regular intervals. Finally, a button is provided that samples an accelerometer for one second and displays a graph of its data.
The project consists of two parts:
- JavaScript and HTML that run in the user's (client’s) web browser
- Node.js project files (including JavaScript, package files, and C++ source code) for direct hardware interfacing (the server).
This will be demonstrated on the Technologic Systems TS-7680 which supports an ARMv5 CPU, using node 0.10.
Note: A TS-7680 with 256 MB of onboard RAM is required to install this demo properly. If you want to run this demo on a board with only 128 MB of RAM, download tarball containing the service-mx28adc module from this ftp server and install it by unpacking the directory containing your node_modules directory. Afterwards the apt install command will recognize this module is already installed and won’t try to compile it.
Let’s look at the files we will be creating.
For the client:
- ts7680.js – This is the actual implementation of the user interface to the TS-7680. It will display the current state of the LEDs and ADCs, and provide an interface to sample the accelerometer.
- index.html – This is the HTML code to display the user interface.
- 7680-0000.JPG through 7680-1111.JPG – These are image files that will display the state of the TS-7680’s onboard LEDs in the web interface. One file exists for each bit combination (0000, 0001, 0010, etc.) on the LEDs.
There are several Node.js packages on the server, each performing a specific function:
- ts7680-demo-server – This is the top-level server that specifies and controls instantiation of the components of the server. It also contains all of the client files needed to make the entire project a self-contained package.
- server.js – Implementation
- package.json – Manifest
- README.md – Readme file in markdown format
- file/ – sub-directory containing the client files
- express-modular-server – This is a modular framework for serving HTTP and HTTPS web pages from Node.js.
- server.js – Implementation
- package.json – Manifest
- README.md – Readme file in markdown format
- service-app – A plug-in to serve web apps (app.html + app.js + app specific modules) that is used for default file handling implemented therein.
- default-file.js – Implementation of static file serving
- package.json – Manifest
- README.md – Readme file in markdown format
- app.js – Implementation of app handling (not used in this project)
- service-mma8451 – A plug-in that implements application programming interface (API) support for the NXP MMA8451 3-axis accelerometer on the TS-7680.
- mma8451.js – Implementation
- package.json – Manifest
- README.md – Readme file in markdown format
- service-mx28adc – A plug-in that implements support for the i.MX28 CPU low-resolution analog to digital converter (LRADC) peripheral on the TS-7680.
- mx28adc.js – Plug-in implementing API support
- mx28adc.cc – Implementation
- package.json – Manifest
- Binding.gyp – Build file
- README.md – Readme file in markdown format
- service-gpio – A plug-in that implements API support for GPIO through the Linux /sys filesystem.
- gpio.js – Implementation
- package.json – Manifest
- README.md – Readme file in markdown format
Now, onto the code.
ts7680-demo-server
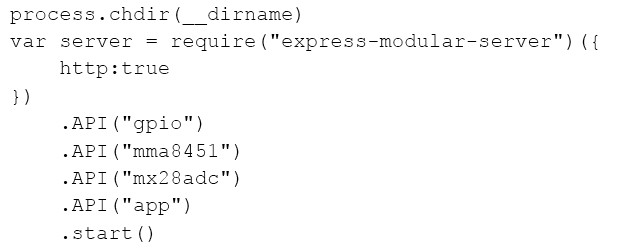
First, let’s look at the top-level JavaScript file we will be invoking to run our server: server.js.
The express-modular-server package makes creating web servers easy. We write a plug-in for each service, which initializes the API endpoint and service requests. Then we configure the server, specify each desired endpoint, and start the server.
Dissecting the above code piece by piece, we first change our current working directory to the directory where the package was installed. This is because our package encapsulates all our statically served files in the subdirectory file/ relative to this directory.
process.chdir(__dirname)
Next, we require express-modular-server:
var server = require("express-modular-server")
This returns a function that we call with initialization data as part of the same expression:
({
http:true
})
Here, we are passing an object containing the initialization parameters. The only parameter we are interested in is running the HTTP server. The argument http:true specifies this, though we could also provide a numeric port instead of true. By default port 8080 is used.
We then add each API to the server, omitting the "service-" prefix from the package name. The initialization returns the module object, which has a function to add the API associated with the key API.
.API("gpio")
When this function returns, the gpio plug-in (from the service-gpio package) is loaded. This function returns the module object itself, so we can chain another call to add as many API endpoints as we like:
.API("mma8451")
.API("mx28adc")
.API("app")
Now we have added endpoints for the accelerometer, ADC, and serving web apps. When we are done adding endpoints, we chain one more call to start the server:
.start()
That's it! Here’s what our code looks like:
A few commands need to be run before installing the demo in order for the install and build process to work. First, due to a missing header in Debian we need to upgrade npm and set up a symlink to point to it:

Once npm is upgraded, any time it runs an error will return saying that npm does not support node.js v0.10.29 and that you should upgrade to a newer version. Ignore this warning, as v0.10.29 is the latest version supported by the TS-7680 because newer versions lack ARM v5 support.
You can install the entire demo with a single command:
npm install ts7680-demo-server
Our next installment will begin examining the modules used by the server in detail, starting with the GPIO module.
Technologic Systems
LinkedIn: www.linkedin.com/company/technologic-systems
Facebook: www.facebook.com/embeddedARM
Google+: https://plus.google.com/+Embeddedarm-TS
YouTube: www.youtube.com/user/embeddedarm
GitHub: https://github.com/embeddedarm


